|
Title |
Description |
|
Task 1a - Properties of Waves Part 1 |
Your teacher will show you examples of waves on a
rope and a spring and remind you of a few key terms you need to
know, along with a few new terms you need to integrate into your
vocabulary!
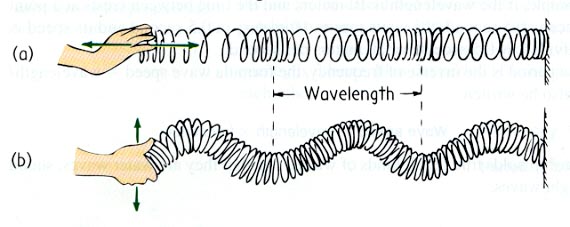
Key terms: transverse, longitudinal, rest
position, oscillation, amplitude, frequency, wavelength, peak,
trough, compression, rarefaction.
|
|
Task 1b - Properties of Waves Part 2 |
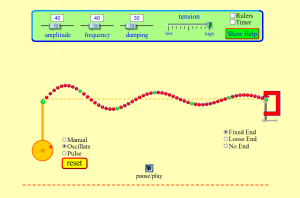
Your teacher will show you a simulation of
a transverse wave. Try to use the terms you have just
learned to describe the waves you see. Your teacher will
also explain what is meant by the term phase.
Teacher note: click
here
to load a copy from the local server. Set to oscillate with an
amplitude of 50, frequency of 25, no damping, no end. Counting the
waves passing a point in 10 seconds works well to illustrate idea of
frequency. |
|
Task 1c - Properties of Waves Part 3 |
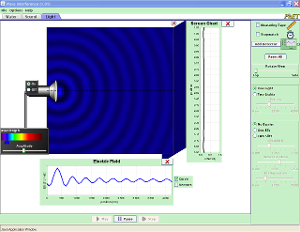
Your teacher will show you an example of a
sound wave propagating through the air. What type of wave
is this? What features can you identify?
Teacher note: select wave type "sound" (2nd
tab), expand the particle area with the green "+" sign, and select
"particle view" with the radio buttons. There is a local
copy stored
here, if the PhET website is inaccessible for any reason. |
|
Task 1h - Wave definitions |
Write definitions for each of the terms on
this list, in words you can understand.
You may wish to draw diagrams to help explain some terms.
wavelength, amplitude, frequency,
period, phase, rest position, oscillation, transverse wave,
longitudinal wave, polarisation |
|
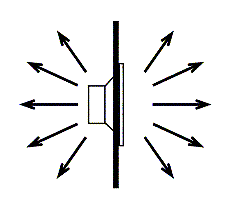
Task 2 - Loudspeaker and baffle |
Your teacher will show you the effect of placing
a baffle in front of a loudspeaker. The results may be
surprising! Your teacher will ask you to share your ideas,
to try to explain what is happening!
Teacher note:
it is worth looking at "demonstration activity 10D" on the
Advancing Physics CD. |
|
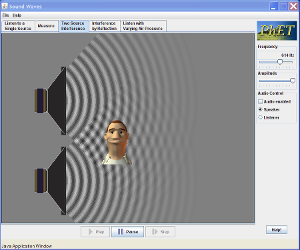
Task 3 - Hearing superposition |
Your teacher will show you a demonstration of one
effect of wave superposition, using two loudspeakers and a
signal generator. Walk slowly in front of the loudspeakers
- what do you notice? Can you explain the differences you
hear? Your teacher will ask you to
explain what is happening, using some of the same ideas you
explored in the last task (Powerpoint slide of experimental set up
here). You may also like to look at the simulation
below, which should help you visualise and investigate the
interference of sound waves from two sources.
Note: there is a local copy of simulation
here.
When you are happy you
understand, try
these questions (Q40S) which look at the mathematics leading
to this effect.
Teacher note: it is worth looking at activity / experiment
30E on the Advancing Physics CD. Also, questions Q50S may
be useful for further analysis of the phenomenon. |
|
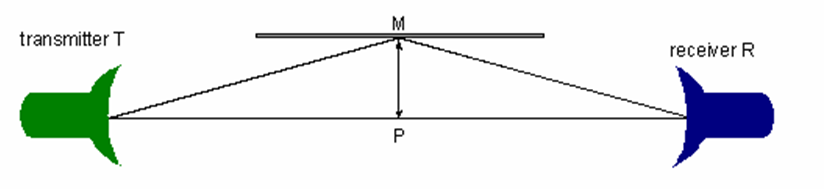
Task 4a - Lloyd's mirror (microwaves) |
Your teacher will show you a demonstration of
"Lloyd's Mirror" for microwaves. Observe the effects of
moving the mirror on the superposition of the waves. When
you are happy you understand, answer
these questions (Q30S).
 |
|
Task 4b - superposition and speed measurement |
Try
these questions, which show how the superposition of
reflected waves can be used to measure speed.
 |
|
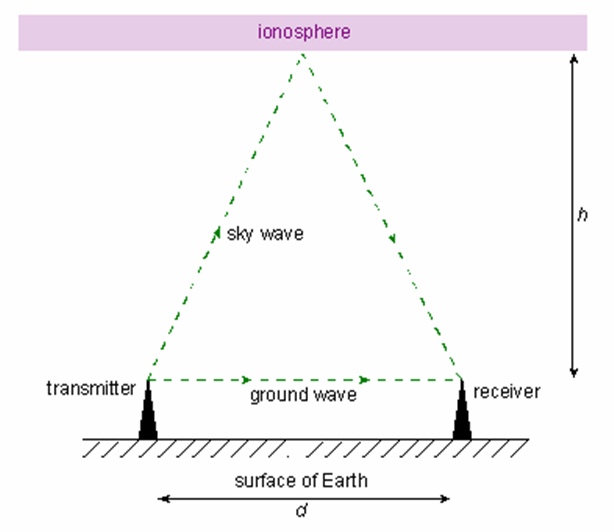
Task 5 - superposition of radio waves |
Try
these questions (Q190S - "superposition of radio waves"),
which look at the "fading" effect sometimes observed when radio
waves are reflected from the ionosphere.
 |
|
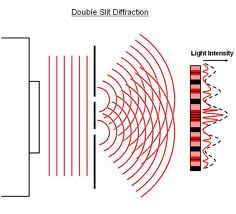
Task 6a - Young's Slits |
Your teacher will demonstrate what happens when
coherent laser light passes through a narrow double-slit.
Observe the results carefully. Can you explain what you
see? (You may want to think back to the results of the
demonstration with the loudspeakers in Task 3!)
Listen carefully as your peers share their ideas
- you will need to write an explanation of what you have seen
using correct technical language. |
|
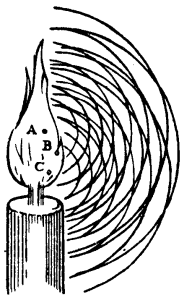
Task 6b - Wave explanation of two slit
diffraction (Huygens) |
These instructions guide you through drawing "Huygen's
style" wave diagrams using a compass and graph paper, in order
to explain two slit interference.
 |
|
Task 6c - Wave explanation of two slit
interference (path difference) |
Your teacher will explain the geometry behind the
diffraction pattern you have observed, using [this
presentation]. You may also wish to look at
this
applet, which shows how the interference pattern in Young's
2-slit experiment is formed in terms of the path difference of
the waves from each slit.
 |
|
Task 6d - Two source interference problems |
Try
these homework problems (Q180S), which look at two source
interference in a variety of situations. |
|
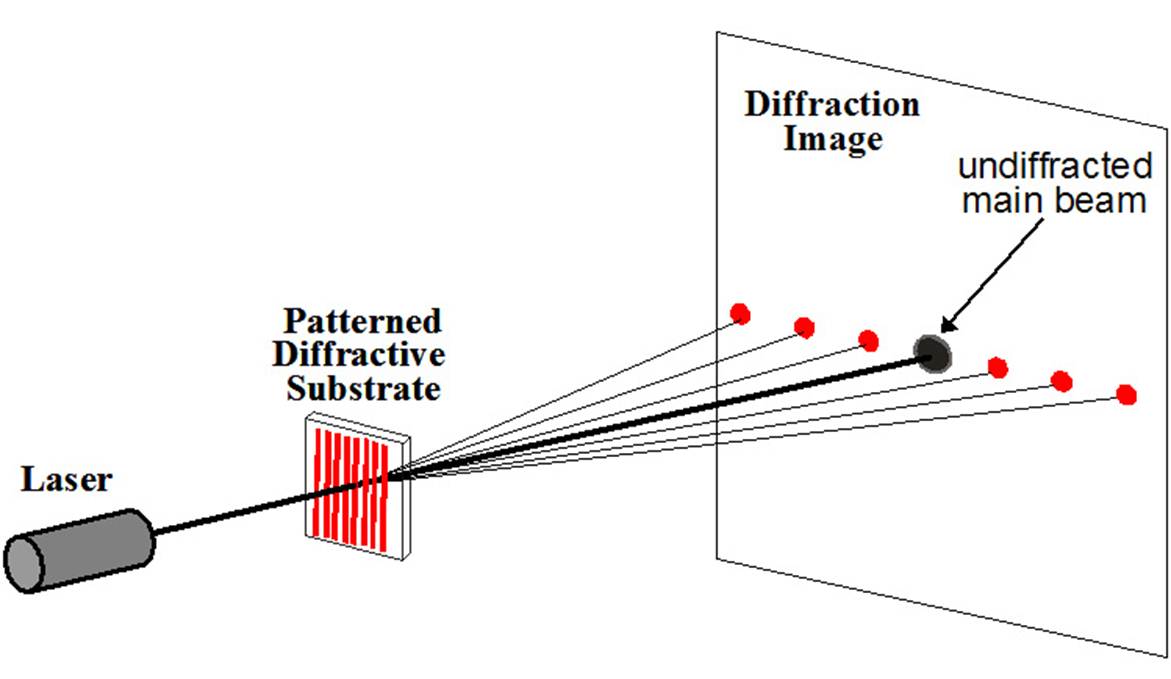
Task 7a - Diffraction gratings |
Your teacher will show you
this presentation, and
explain the geometry which leads to the formation of bright and
dark fringes through a diffraction grating. Answer
these
questions (Q200S) about diffraction through gratings.
 |
|
Task 7b - More diffraction problems |
These questions will give you a little more practice with
the diffraction formula.
 |
|
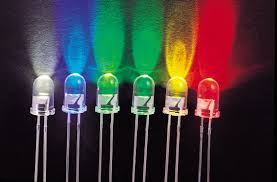
Task 7c - Measuring the wavelength of light
(practical task) |
You are going to carry out a practical task to
find the wavelength of light coming from 3 different LEDs, by
measuring the positions of the fringes observed through a
diffraction grating. Follow the instructions on
this powerpoint presentation to carry out the practical
task. Record your results on
this sheet.
 |
|
|
|
|
Task 8 - Wave superposition |
We have seen examples of what happens when two
waves meet with differing relative phases. Complete
this activity (10W) to demonstrate your understanding of
wave superposition.
 |
|
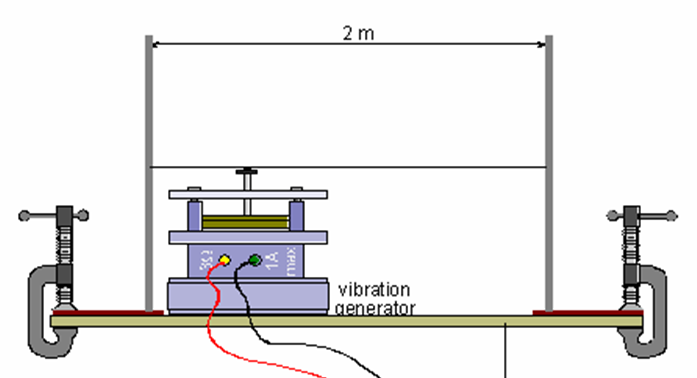
Task 9 - Waves on a string |
Your teacher will demonstrate "standing waves"
being formed on a string, using a signal generator and a
mechanical oscillator. Watch carefully and listen as your
teacher explains how the standing waves are formed. You
may also find it useful to look at
this simulation of a wave on a string. When you are
happy you understand, answer
these questions (Q90S).
 |
|
Task 10a - Waves in a pipe |
Your teacher will show you how standing waves can
be set up in a pipe which is open at both ends, and explain how
this can happen. The waves produced can be observed on the
oscilloscope; you should see a sharp increase in the amplitude
as the fundamental frequency is reached, and then again at each
of the harmonics.
Make a note of the
frequencies at which standing waves occur. Your teacher
will show you how to use this data to calculate the speed of
sound in air!
|
|
Task 10b - Waves in a pipe II |
This simulation allows you to look at the fundamental frequency and harmonics of standing
waves in a pipe. See what effect the kind of pipe has
(both ends open, both ends closed, or one end open). Pay
close attention to the arrangement of pressure nodes
and pressure antinodes. You will also find
it useful to look at the arrangement of displacement nodes
and displacement antinodes.
These
summary notes give you the general rules used for
calculating the wavelengths and frequencies of the harmonics in
each type of pipe, with diagrams for the first few harmonics in
each. When you are happy you understand, try answering
these
questions (Q100S).
Teacher note - here are some
starter questions on the same topic for the subsequent
lesson. |
|
Task 10c - Waves in a pipe III |
Starter questions -
key terms used to describe standing waves (powerpoint
presentation). Suggested exam questions
to try:
June 2002 Q1 (Section A, 3 marks)
Jan 2003 Q4 (Section A, 4 marks)
Jan 2001 Q9 (Section B, 10 marks) |
|
Task 11a - Colours in thin films |
You will have seen colours formed in thin films,
such as the films of oil which can sometimes be found floating
on a puddle. You are going to look at the colours formed
by interference of light reflected by a soap film. Follow
the
instructions on this sheet (Activity 210E) to set up the
experiment.
Your teacher will
show you
this powerpoint presentation and help explain the process
leading to the formation of the different coloured fringes, in
terms of the path difference of the waves reflecting from the
front and rear surface of the film, and hence their relative
phase when the superposition occurs. Think about the
questions on
this powerpoint presentation, which should help develop your
understanding of why the fringes are formed. Your teacher
will give you a copy of
these diagrams to stick into your exercise book. |
|
Task 11b - Colours in thin films |
Starter questions for the subsequent lesson, in powerpoint
format. |
|
Task 12a - Phasors |
Your teacher will explain to you how phasors can
be used to represent the instantaneous position of a wave in its
cycle, and how these phasors can be used to find the resultant
wave when two waves superpose. You may find it useful to
stick
these diagrams in your exercise book.
When you are happy you understand, try
these questions (Q30W). It is also useful to see how
the phasor translates to the more familiar "wave cycle".
Fetch a compass and some graph paper and try
this activity (Q220S). |
|
Task 12b - Phasors |
Try the following exam questions:
•
Jan 2001 Q5 (Section A, 4 marks)
•
June 2001 Q3 (Section A, 3 marks)
•
Jan 2004 Q6 (Section A, 3 marks) |
|
|
|